
As an Amazon Associate I earn from qualifying purchases. Affiliate links may earn a commission at no additional cost to you.
Jump to nail ideas
PREP · CREATE · FINISH
Nail Art Essentials
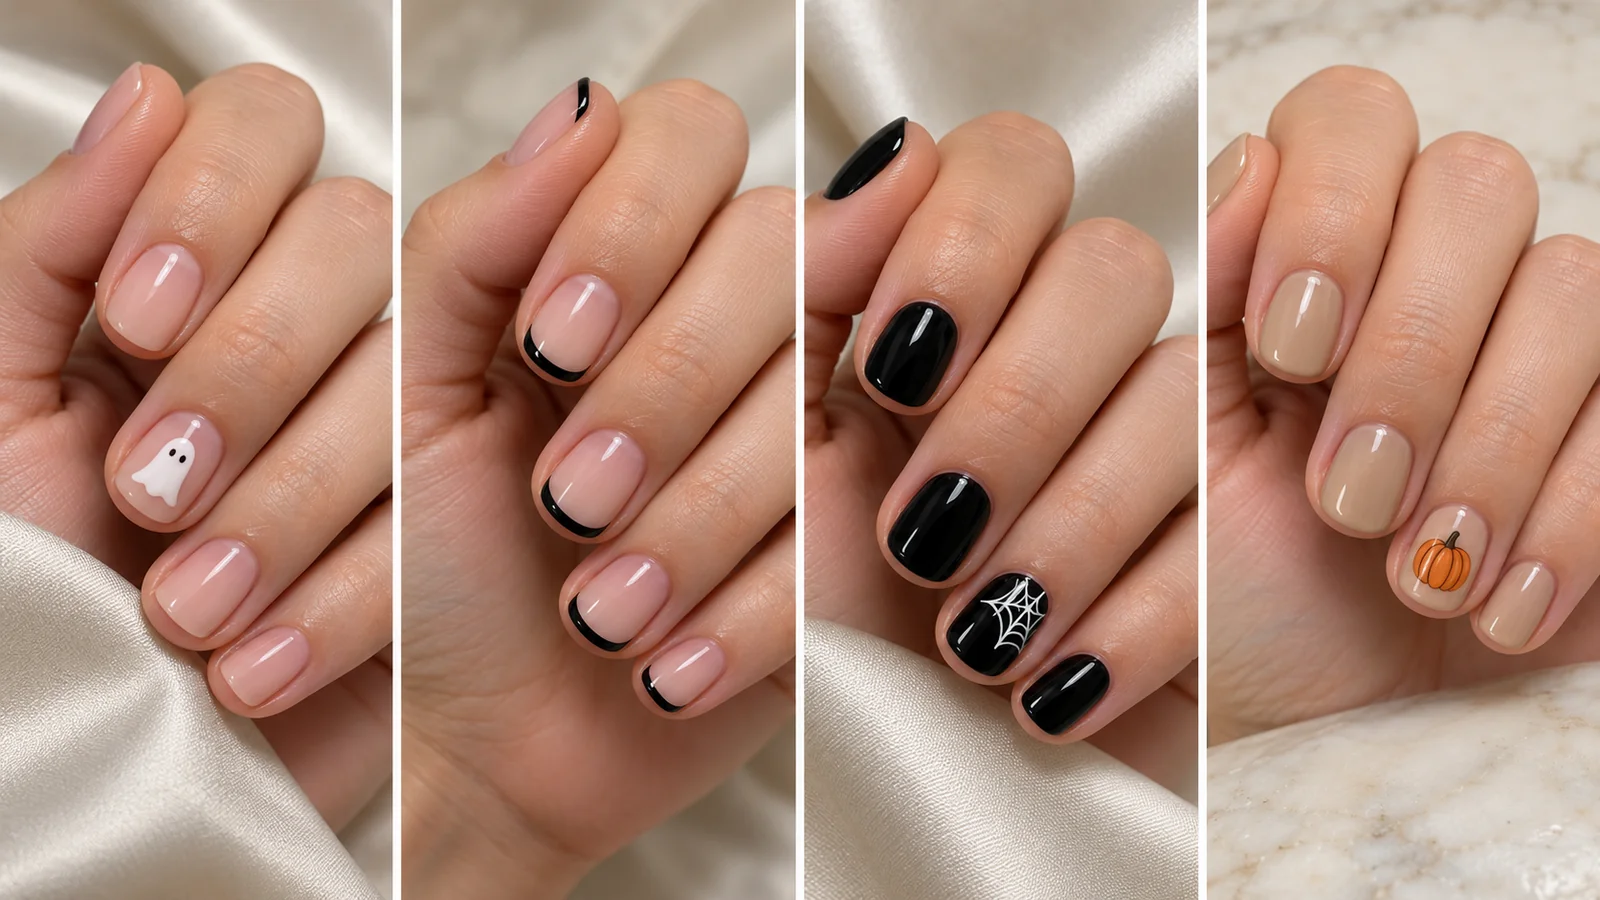
Paid links · Search options; check suitability and current details on Amazon.Short Halloween nails can feel festive without needing long extensions or a crowded design. Tiny ghosts, a fine web or a dark French edge can give a short manicure a clear seasonal detail while leaving enough space for the shape to show.
The ideas below focus on compact patterns and restrained placement. Choose the length and outline you enjoy wearing, then use one or two accent nails when a motif needs more room. A simple reference often makes the salon conversation easier.
1. Tiny White Ghost on a Sheer Pink Base
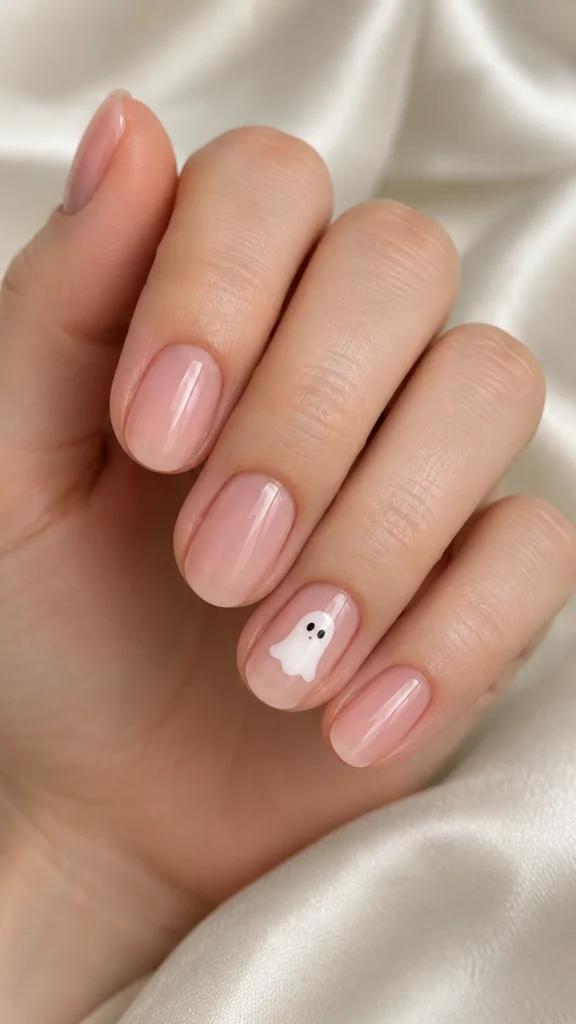
A sheer pink base keeps the manicure light while one small white ghost makes the Halloween theme clear. Give the ghost two tiny dark eyes and a simple curved lower edge; extra facial details can become hard to read on a short nail. Leave the other nails plain so the accent feels deliberate.
Best For: A subtle Halloween manicure for everyday wear.
Sophie’s Tip: Keep the ghost within the center of the nail rather than stretching it from cuticle to tip.
2. Black Micro French Tips
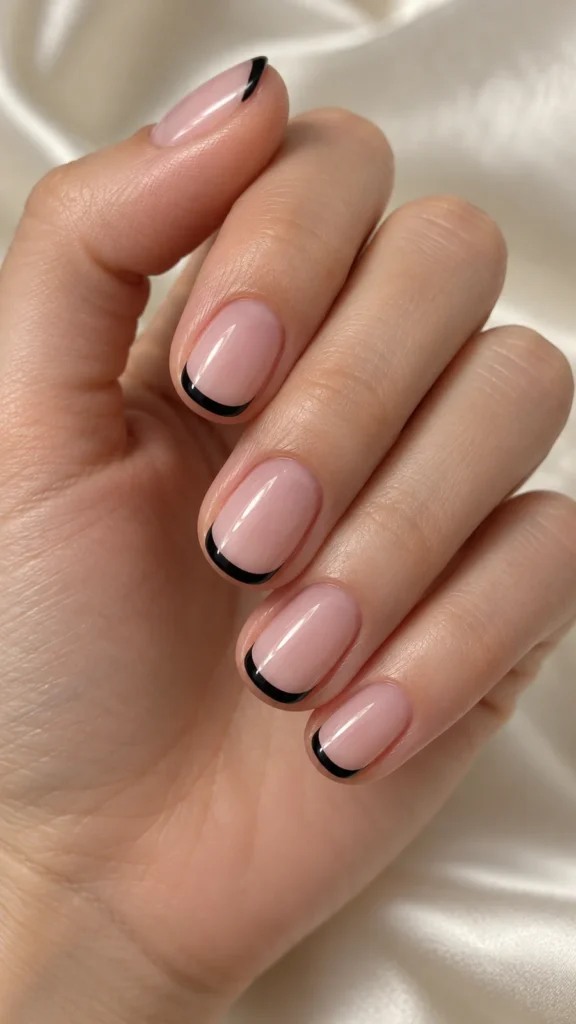
A narrow black edge creates a seasonal alternative to a white French manicure. The sheer pink base keeps the contrast crisp, and a fine line leaves most of the short nail visible. This design makes the outline the main feature without needing a Halloween illustration or several different accent colors.
Best For: A polished manicure with a quiet Halloween mood.
Sophie’s Tip: Ask for a slim edge that follows your natural outline instead of a thick straight black band.
3. Fine White Web on a Black Accent Nail
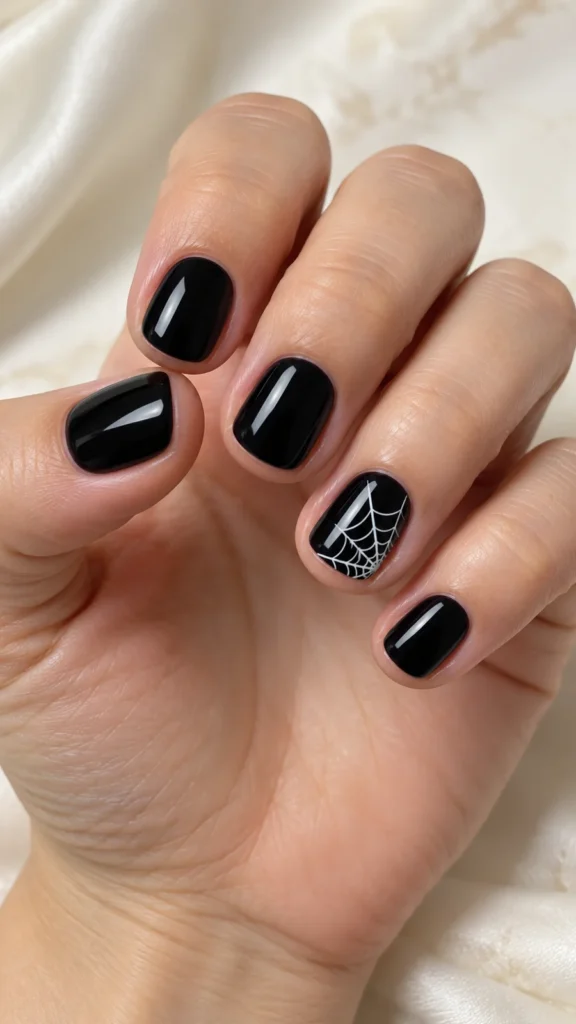
A glossy black accent gives a fine white web a clear background. Keep the web toward one corner, with only a few connecting lines, so it remains readable at a compact length. Use plain black on the other nails to keep the set cohesive rather than adding competing symbols.
Best For: A small spiderweb detail with strong contrast.
Sophie’s Tip: Show a reference with thin, separated lines; a dense web can become a white patch on short nails.
4. Tiny Pumpkin on Warm Beige
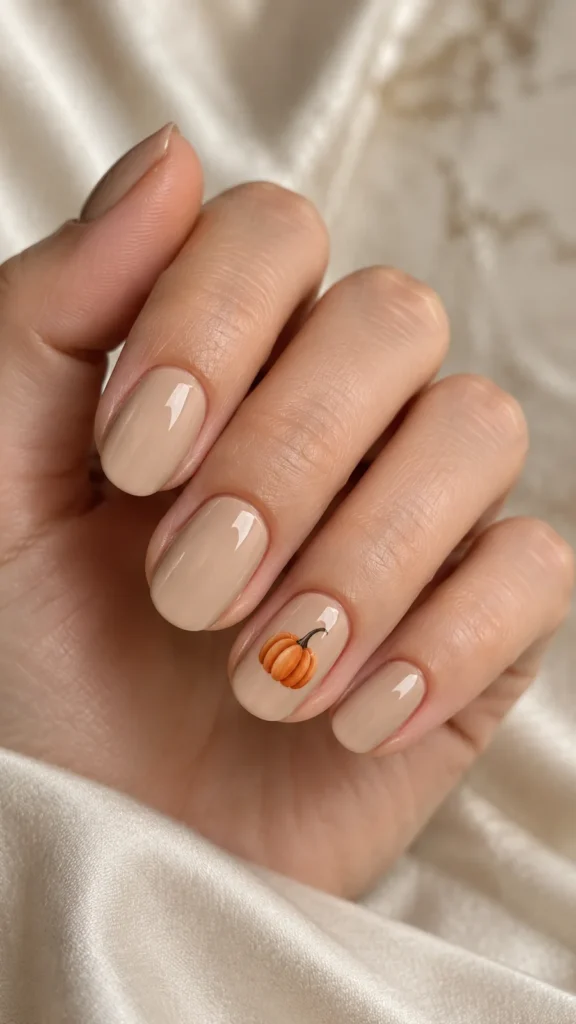
Warm beige gives a miniature orange pumpkin enough contrast without making every nail bright orange. One rounded pumpkin with a fine stem is enough to establish the theme. Keep the remaining nails glossy beige, or use one solid orange nail if you want a slightly more playful balance.
Best For: Pumpkin patches and casual Halloween plans.
Sophie’s Tip: Place the pumpkin slightly below the center so the stem has room without touching the cuticle.
5. Black Star Accents on Milky White
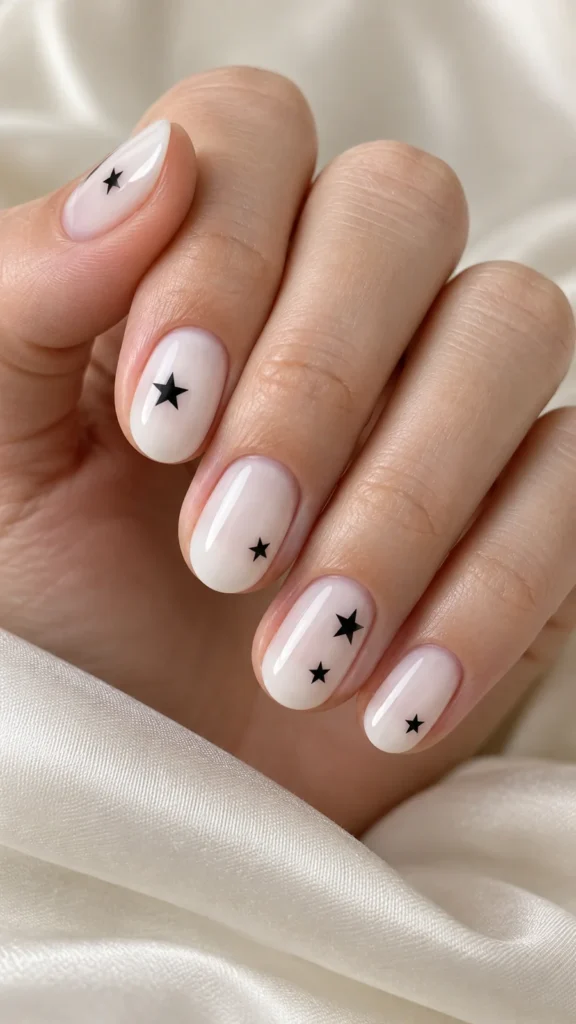
Small black stars stand out against a soft milky white base. Use a few clearly separated shapes rather than a full scattered print. The pale foundation makes the design feel lighter than an all-black set, while the stars provide a seasonal celestial detail that can remain wearable after Halloween.
Best For: A light manicure with a celestial Halloween detail.
Sophie’s Tip: Choose one star size and leave visible white space between the accents.
6. Burgundy Nails With One Tiny Ghost
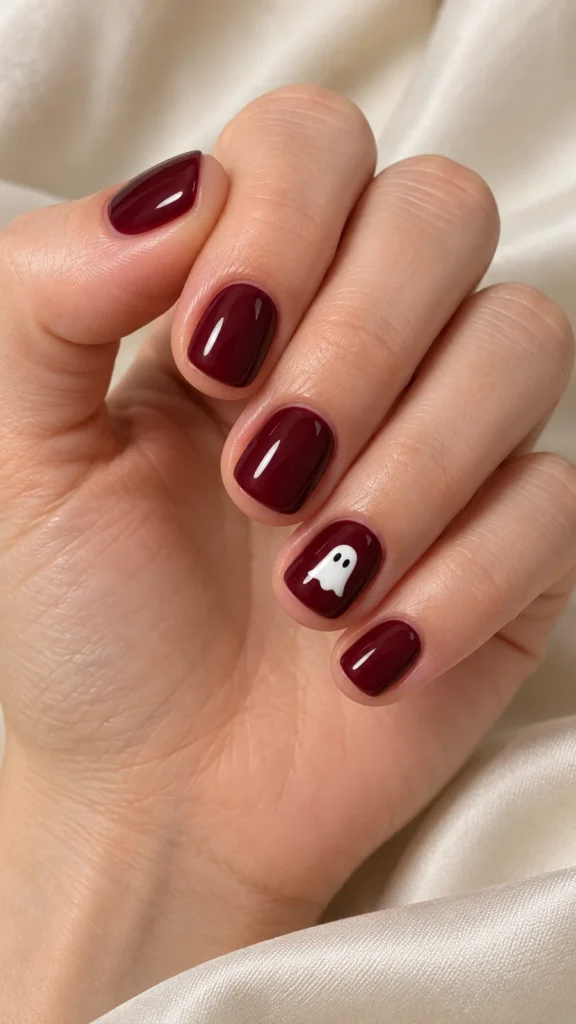
Deep burgundy gives this ghost design a moodier palette than a sheer pink version. Put one small white ghost on an accent nail and leave the rest glossy burgundy. The simple white silhouette provides the contrast, so there is no need for glitter, lettering or several different Halloween motifs.
Best For: A rich fall color with one playful accent.
Sophie’s Tip: Keep the ghost small enough that the burgundy background remains visible around every edge.
7. Orange and Black Half-Moons
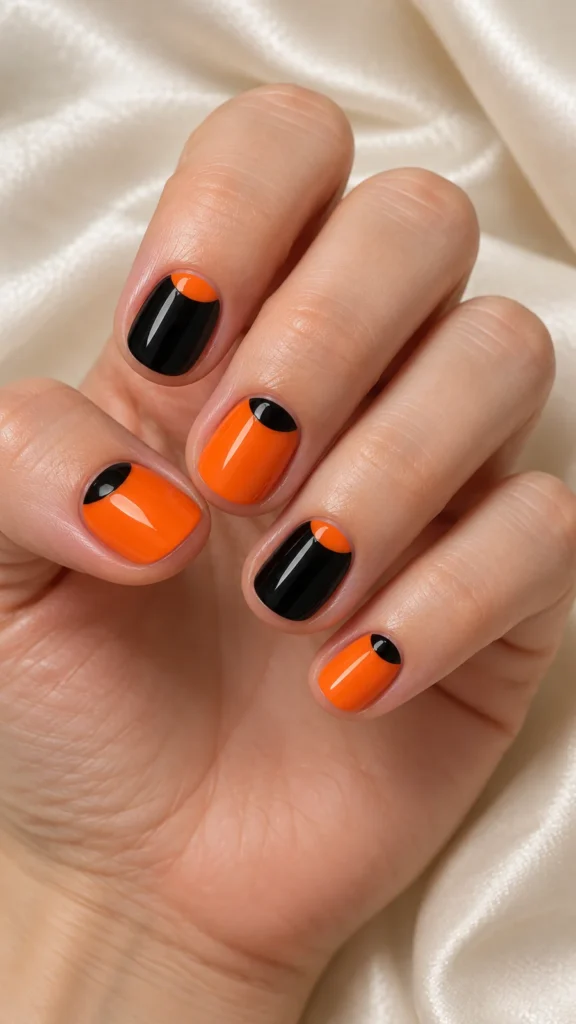
Small half-moons at the base give orange and black a defined place on the nail. Keep the curved accent shallow so the short length does not look divided into large blocks. Alternate the color pairing across the hand while repeating the same outline to make the manicure feel coordinated.
Best For: A graphic Halloween palette without illustrations.
Sophie’s Tip: Ask for the same half-moon depth on each nail so the alternating colors still look balanced.
8. Cream Nails With Tiny Black Cats
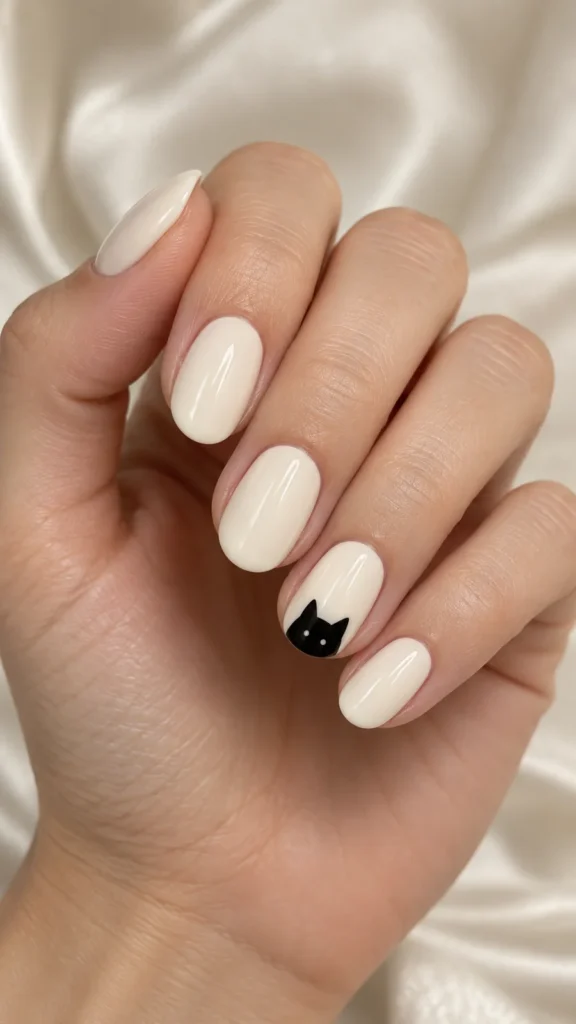
A cream background makes a simplified cat silhouette easy to see. One accent can use two pointed ears and a compact head shape instead of a full cat illustration. Keep the other nails cream, allowing the small black detail to remain the focus rather than covering the hand with symbols.
Best For: Cat lovers who prefer a restrained accent.
Sophie’s Tip: Choose a simple silhouette; whiskers and a full body may be too detailed for the space available.
9. Black Tips With a Single Silver Star
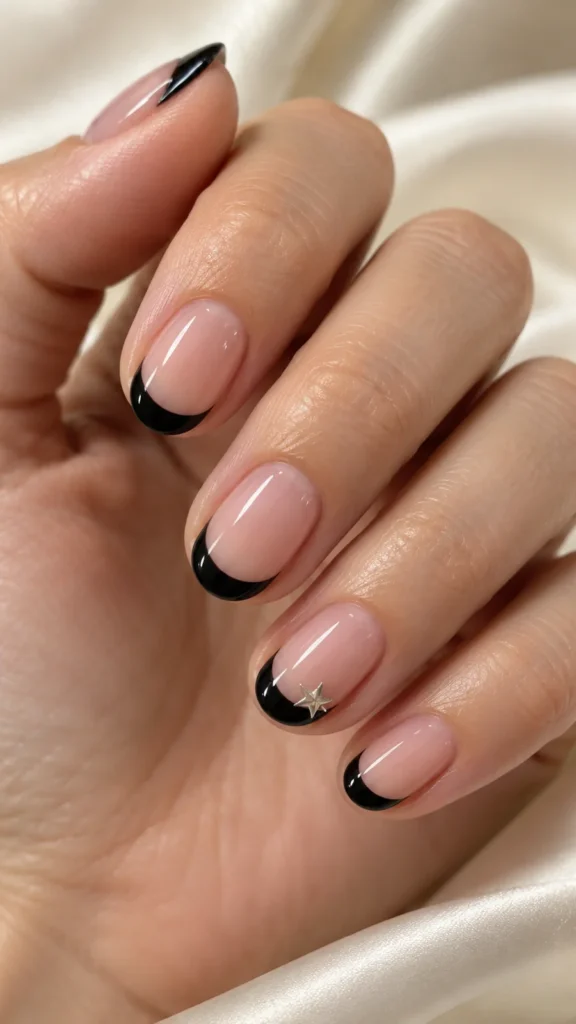
Glossy black tips create the main outline, and one small silver star adds a little light. Keep the base translucent and the tip narrow so the short shape remains visible. A single metallic accent is enough to make the look feel dressed up without turning it into a glitter-heavy manicure.
Best For: A minimal Halloween manicure for evening plans.
Sophie’s Tip: Put the silver star on one accent nail and leave the remaining tips free of decoration.
10. Tiny Bats on a Sheer Beige Base
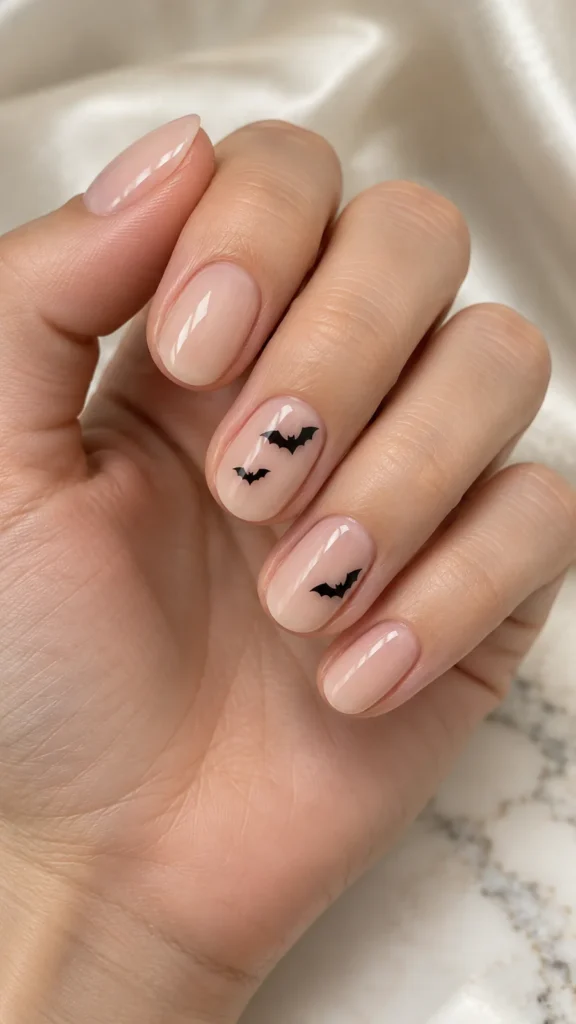
A few small black bats can read clearly when their wings are kept simple. A sheer beige base allows the dark shapes to stand out without a heavy background. Limit each accent nail to one or two bats, leaving the rest plain so the short surface does not become crowded.
Best For: A playful Halloween detail on natural-looking nails.
Sophie’s Tip: Use simplified bat silhouettes with space around the wings rather than several overlapping shapes.
11. Olive Green With a Black Crescent
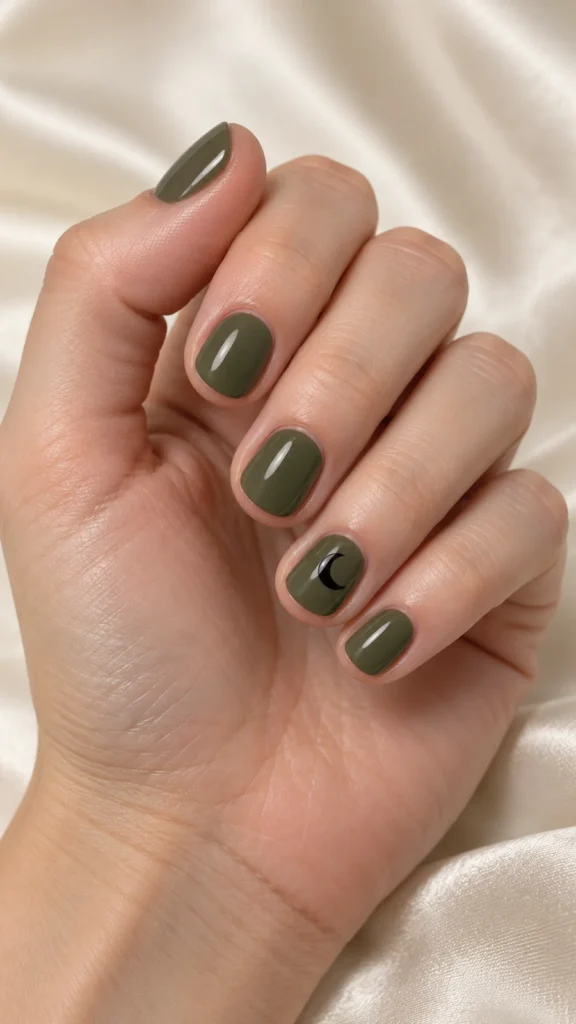
Muted olive brings an earthy fall palette to the manicure, while one black crescent adds a subtle witchy reference. Keep the crescent small and clearly curved. The rest of the nails can remain solid olive, giving the design a cohesive color story without introducing several competing celestial motifs.
Best For: An earthy Halloween look with a quiet accent.
Sophie’s Tip: Choose a black crescent with enough contrast to remain visible against the olive base.
12. Short Black Nails With a Copper Web
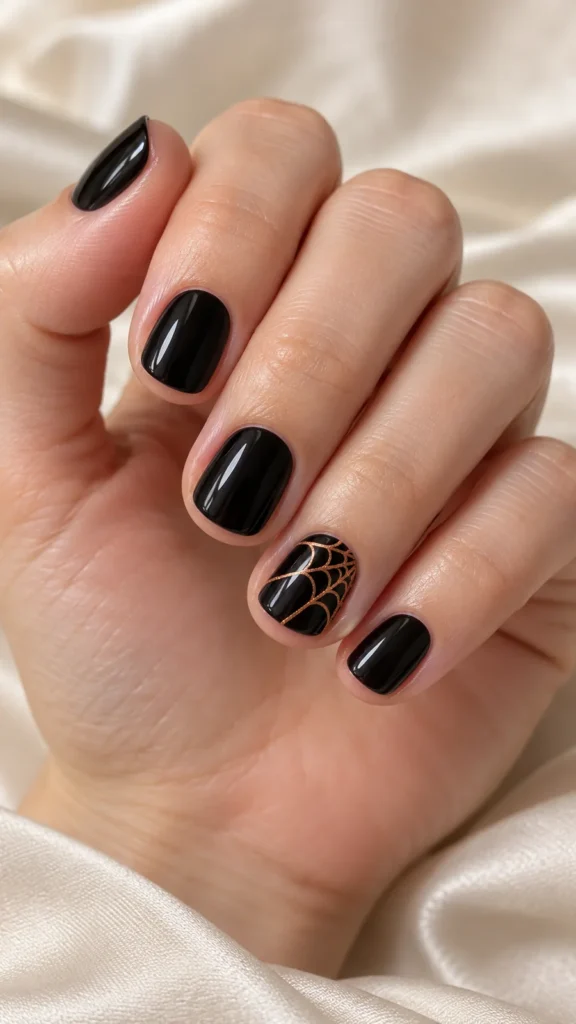
Copper lines add a warm metallic change to a black spiderweb design. Keep the web on one nail and place it toward a corner so the dark background stays visible. The copper connects the manicure to fall colors, while the limited linework keeps the short length from feeling overfilled.
Best For: A darker Halloween set with a warm metallic detail.
Sophie’s Tip: Ask for fine copper lines rather than a thick glitter outline around the whole nail.
13. Tiny Candy Corn Accent
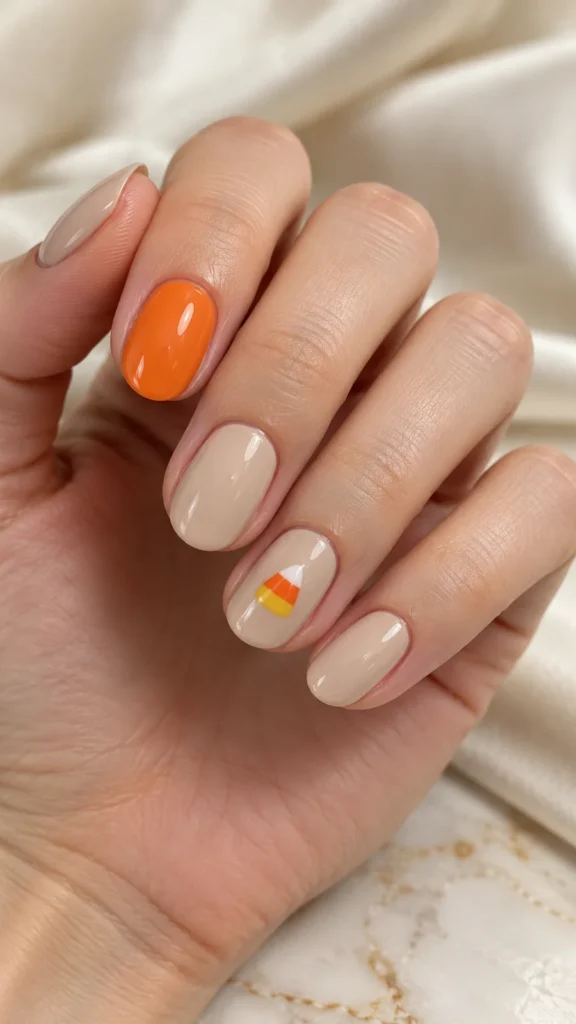
One small candy-corn triangle brings white, orange and yellow into an otherwise neutral set. A warm beige base keeps the accent readable, and the narrow color bands establish the motif without extra outlines. Let the remaining nails stay plain or use one orange nail for a coordinated color echo.
Best For: A cheerful manicure for casual Halloween celebrations.
Sophie’s Tip: Keep the triangle compact and the three bands cleanly separated so the detail reads at a glance.
14. Glossy Black With a Matte Accent
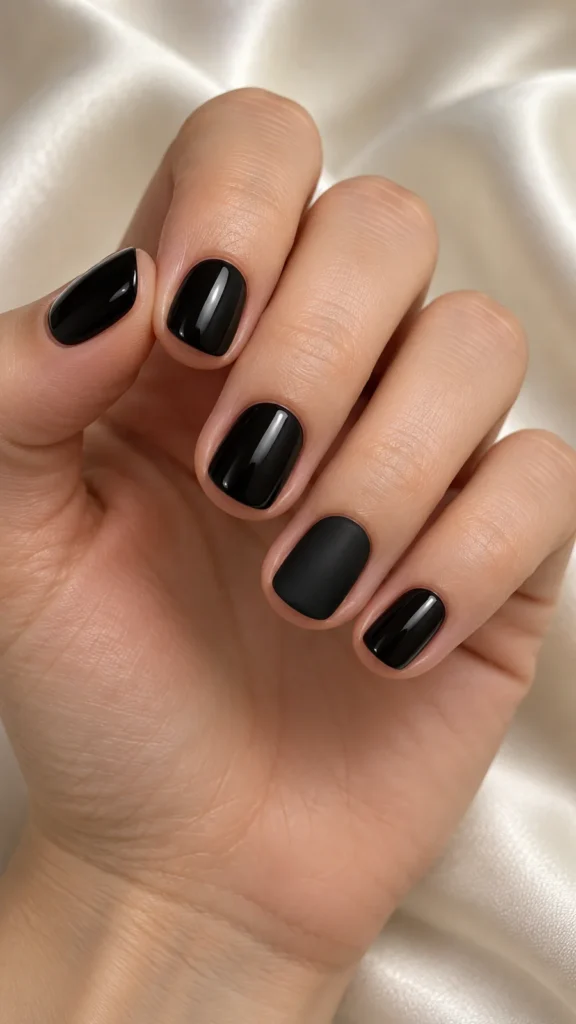
Using glossy and matte finishes in the same black palette creates contrast without additional color. A matte accent can remain plain while the other nails reflect light. This is a Halloween-friendly reference when you want the mood of a dark manicure while avoiding ghosts, pumpkins and detailed painted illustrations.
Best For: A simple black manicure with a finish contrast.
Sophie’s Tip: Use one full matte accent instead of several tiny finish changes that may be difficult to notice.
15. Black Dot Borders on Sheer Pink
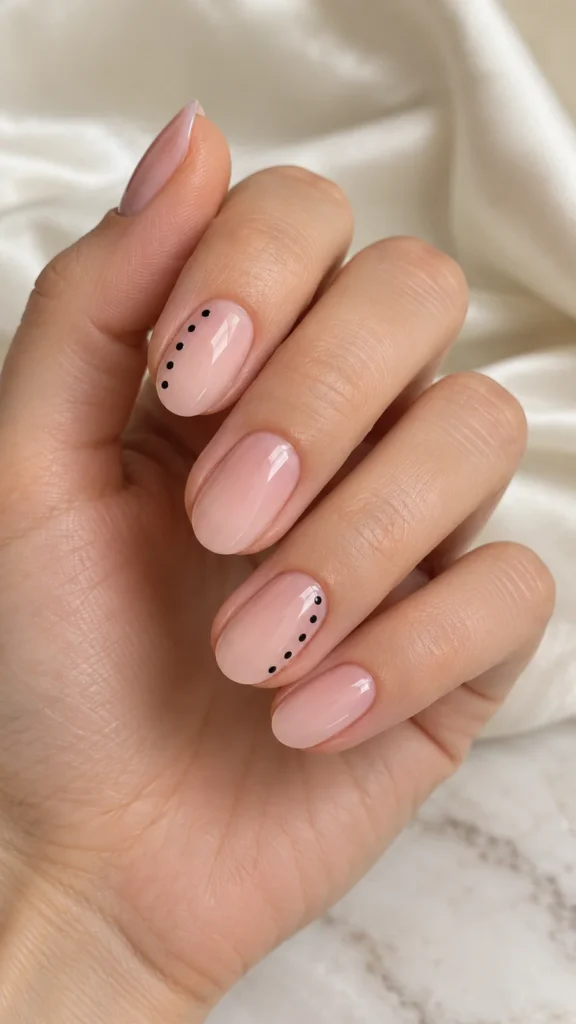
A few tiny black dots along one edge create a graphic detail on a sheer pink base. Keep the dots evenly spaced and use the border on selected nails rather than outlining every finger. The result feels seasonal through its black-and-pink contrast while remaining less literal than a Halloween character design.
Best For: An understated Halloween manicure with a graphic edge.
Sophie’s Tip: Choose one border direction and repeat it consistently so the accents look intentional.
Choose One Detail That Fits Your Nail Length
For short nails, begin with one motif and leave enough background visible around it. If you prefer a busier seasonal set, explore the broader Halloween nail art ideas. For everyday options after the holiday, browse our Short Nails collection.
YOUR COMPLETE STYLE
Found your next manicure?
Coordinate your manicure with outfit and hairstyle ideas.
COMPLETE MY LOOK →
ABOUT THE AUTHOR
Sophie Marlowe
Sophie Marlowe is the fashion and beauty editor behind HerCurvesEdit. She shares flattering outfit ideas, modern hairstyles, nail inspiration, and practical styling guidance for women of every curve and age. Her goal is to make getting dressed feel easier, more confident, and more personal.
More from Sophie Marlowe →

Leave a Reply