As an Amazon Associate I earn from qualifying purchases. Affiliate links may earn a commission at no additional cost to you.
Jump to hairstyle ideas
TOOLS FOR YOUR ROUTINE
Hair Styling Essentials
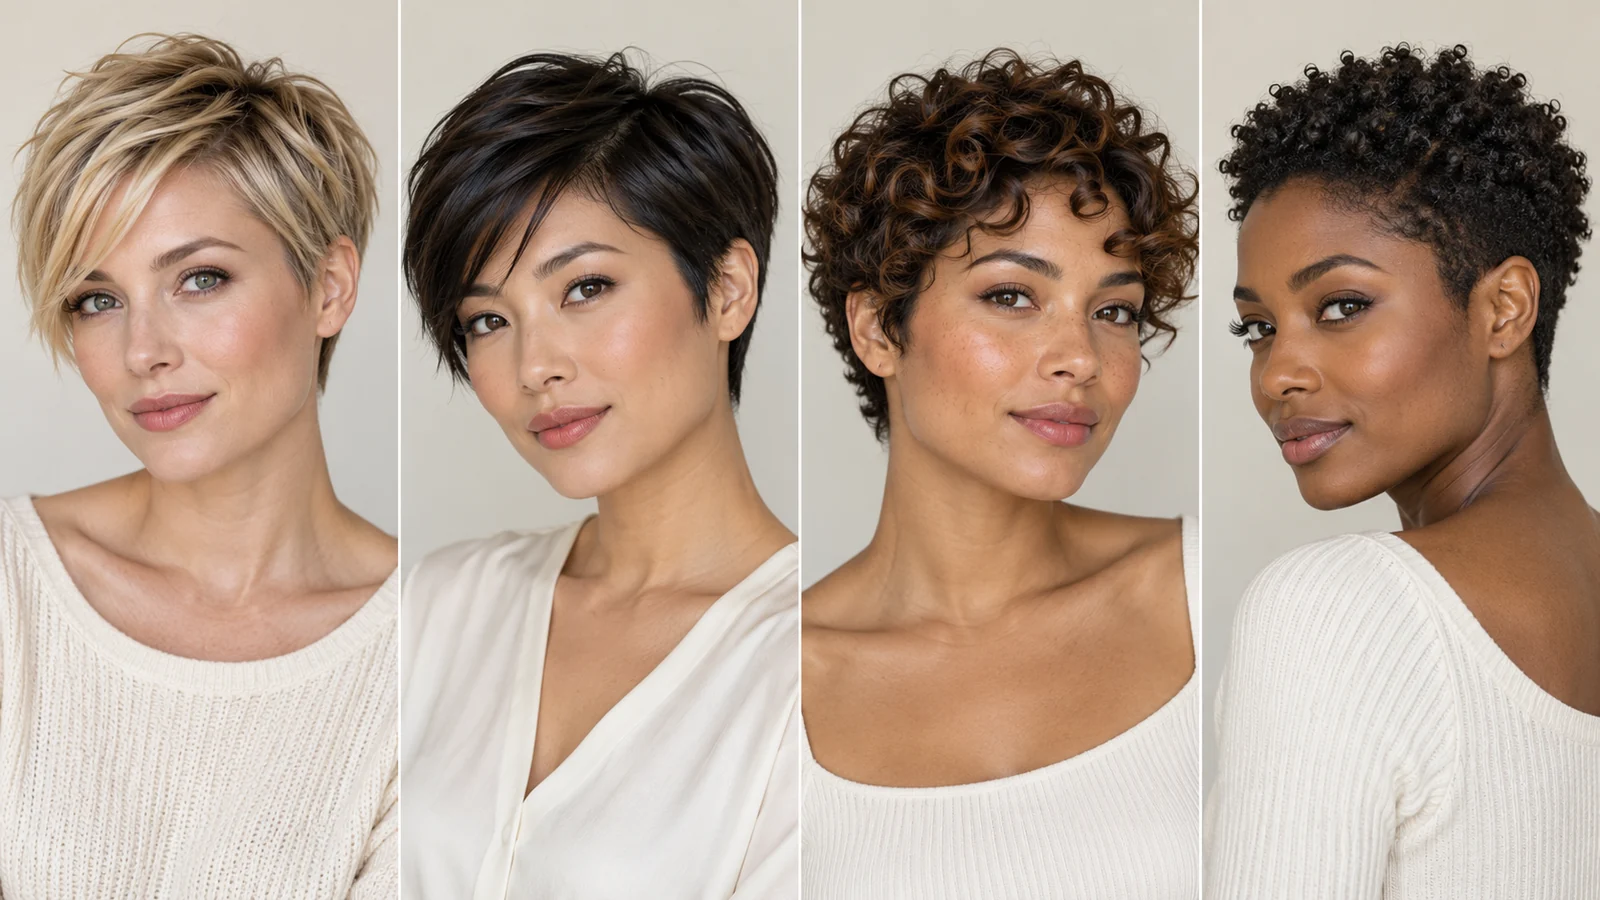
Paid links · Search options; check suitability and current details on Amazon.Pixie haircuts for women can be soft, close-cropped, curly, coily or long enough to tuck at the sides. The name describes a family of short cuts rather than one fixed shape.
These 15 references help you compare top length, fringe and side details. Choose the outline you enjoy, then discuss how it will work with your texture and everyday routine.
Plan the Shortest Sections First
Before cutting, agree on the length at the ears, fringe and nape. Mention cowlicks, glasses and any sections you want to tuck. Ask what the reference looks like without its salon styling and how often you may want the shape refreshed.
1. Soft Pixie With a Longer Top
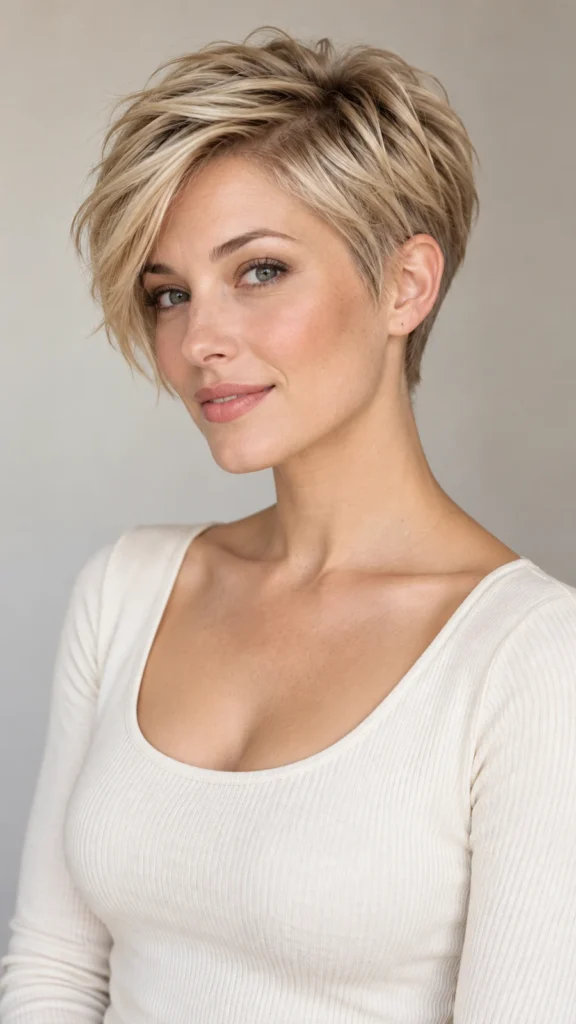
A longer top keeps this pixie flexible while the shorter sides define the outline. The upper sections can fall forward or softly to one side, depending on your growth pattern. It is a useful reference if you want a short cut with room to change the front arrangement.
- Best For: Straight or wavy hair.
- Ask Your Stylist For: A soft pixie with a longer top and gently shaped sides.
- How to Style: Guide the top with your fingers along its natural direction.
Sophie’s Tip: Agree on the shortest side length before cutting.
2. Side-Swept Pixie
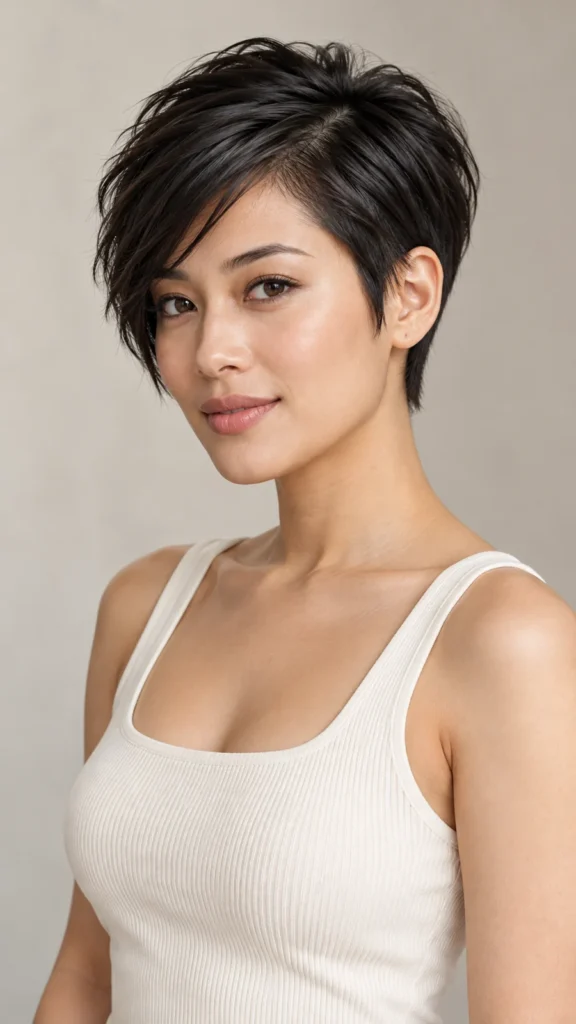
A longer front creates a diagonal line without needing a fringe across the whole forehead. The side direction should suit the way your hair settles, especially if you have a strong part. Check how the front looks both loose and moved away from your face.
- Best For: Hair with a comfortable side direction.
- Ask Your Stylist For: A pixie with a longer side-swept front and balanced shorter sides.
- How to Style: Arrange the front across softly rather than flattening the entire top.
Sophie’s Tip: Show the stylist where your part falls without styling.
3. Curly Pixie With a Rounded Top
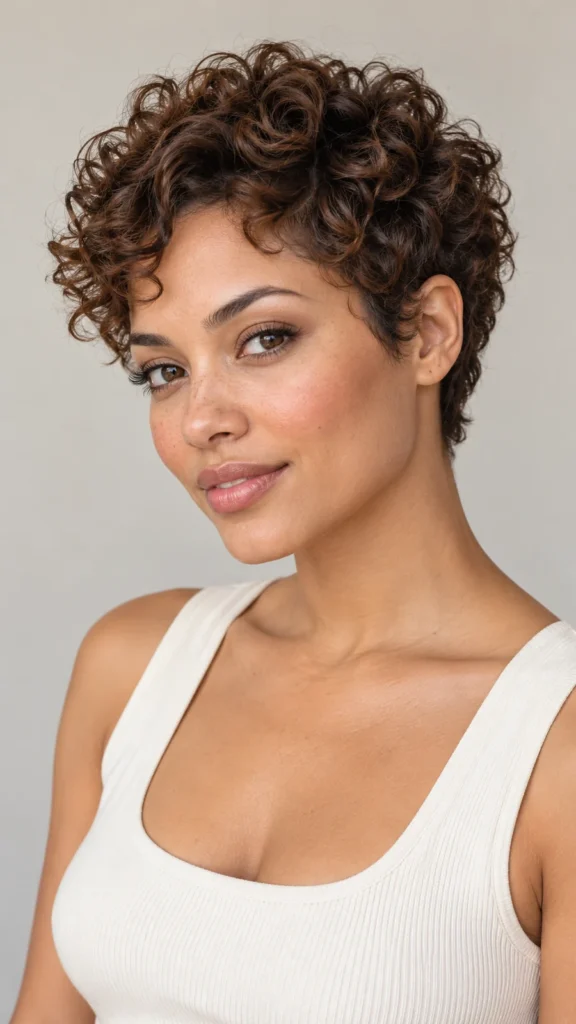
A rounded upper shape lets the curls remain the main detail while shorter sides keep the cut compact. The top length needs to account for your usual dry curl pattern. A curl that looks long when stretched may sit much higher once you wear it normally.
- Best For: Natural curls.
- Ask Your Stylist For: A rounded curly top with sides shaped around your dry texture.
- How to Style: Use your familiar curl routine and arrange the front curls individually.
Sophie’s Tip: Show your dry curls before deciding the finished length.
4. Coily Pixie With a Tapered Nape
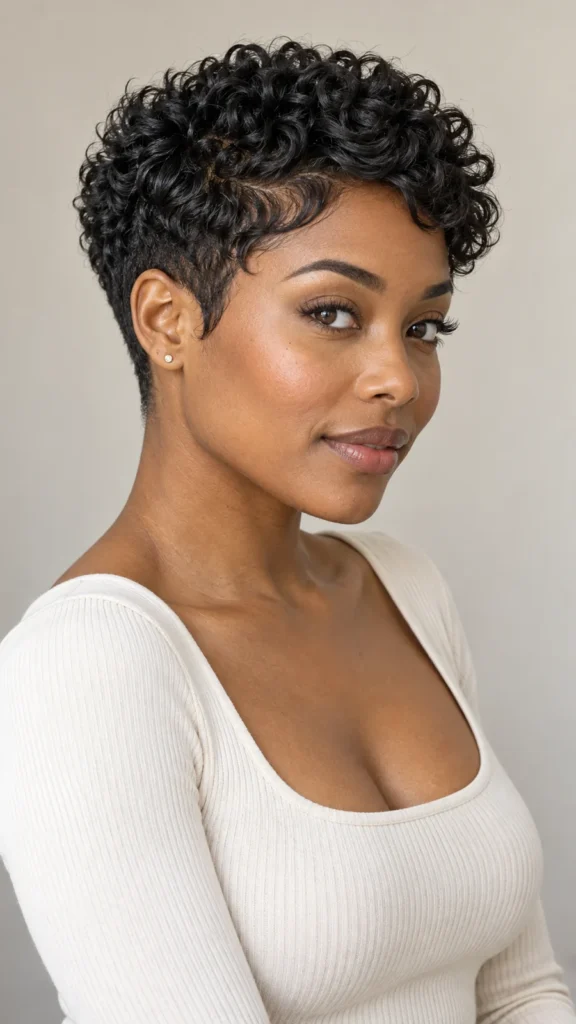
A tapered nape gradually shortens the back while the top retains a fuller coily shape. The degree of taper can be subtle or more pronounced. Discuss the neckline and side profile separately so the back does not become shorter than you intended.
- Best For: Natural coils.
- Ask Your Stylist For: A coily pixie with retained top volume and an agreed nape taper.
- How to Style: Follow your usual coil routine and keep the front direction comfortable.
Sophie’s Tip: Bring a rear-view reference for the neckline.
5. Long Pixie With Tuckable Sides
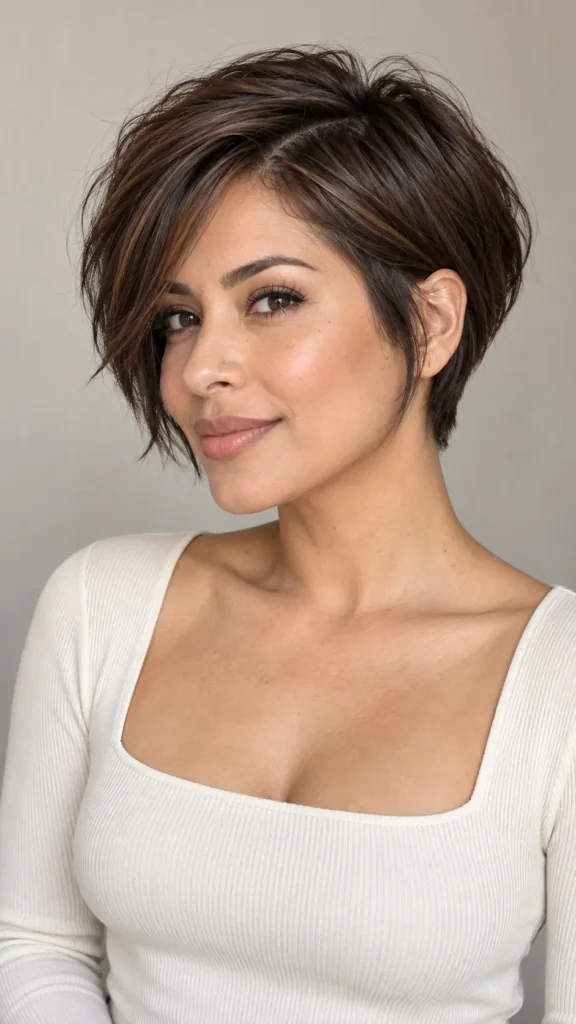
Keeping the sides longer gives this cut a softer outline around the ears. It can feel closer to a very short bob than a closely cropped pixie. If tucking is important, the side length should be checked during the consultation rather than assumed from the haircut name.
- Best For: Straight or wavy hair; retained side length.
- Ask Your Stylist For: A long pixie with side sections that reach your preferred tuck point.
- How to Style: Tuck one side loosely and leave the longer front section free.
Sophie’s Tip: Demonstrate the tuck you want before the sides are shortened.
6. Textured Pixie With a Soft Fringe
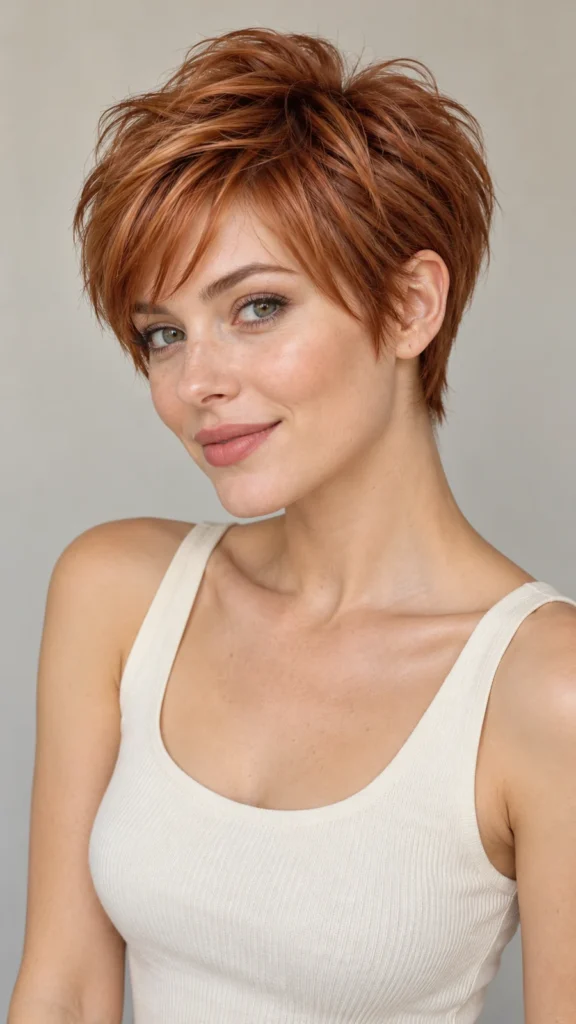
Small separated sections give this pixie a relaxed finish, while the soft fringe brings some detail forward. The amount of texture should suit your density. You can ask for visible movement without requesting that a large amount of hair be removed through every section.
- Best For: Straight or gently wavy hair.
- Ask Your Stylist For: A softly textured pixie with a light forward fringe.
- How to Style: Arrange a few top sections with your fingers and leave the fringe relaxed.
Sophie’s Tip: Ask how much texturizing is planned and where it will be placed.
7. Close-Cropped Pixie
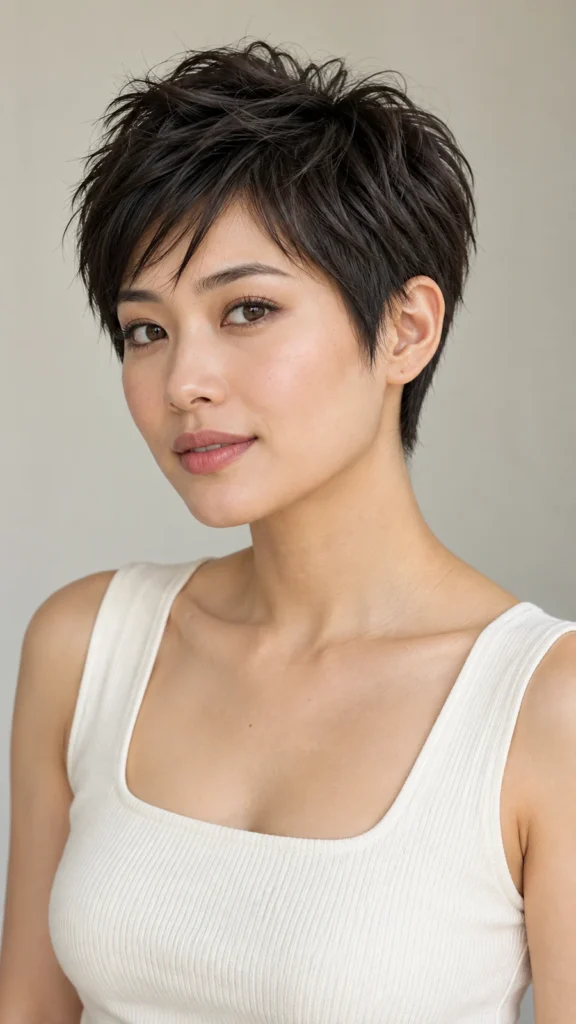
A close crop has a compact outline and puts the hairline and head shape clearly on view. The shortest length is a personal choice rather than a fixed requirement. Discuss how close you want the sides and nape, and whether you prefer an even surface or a slightly longer top.
- Best For: A preference for a very short silhouette.
- Ask Your Stylist For: A close pixie crop with the exact shortest length agreed.
- How to Style: Arrange any longer top sections in their usual direction.
Sophie’s Tip: Use a reference that clearly shows the sides as well as the front.
8. Pixie With Long Curtain Sections
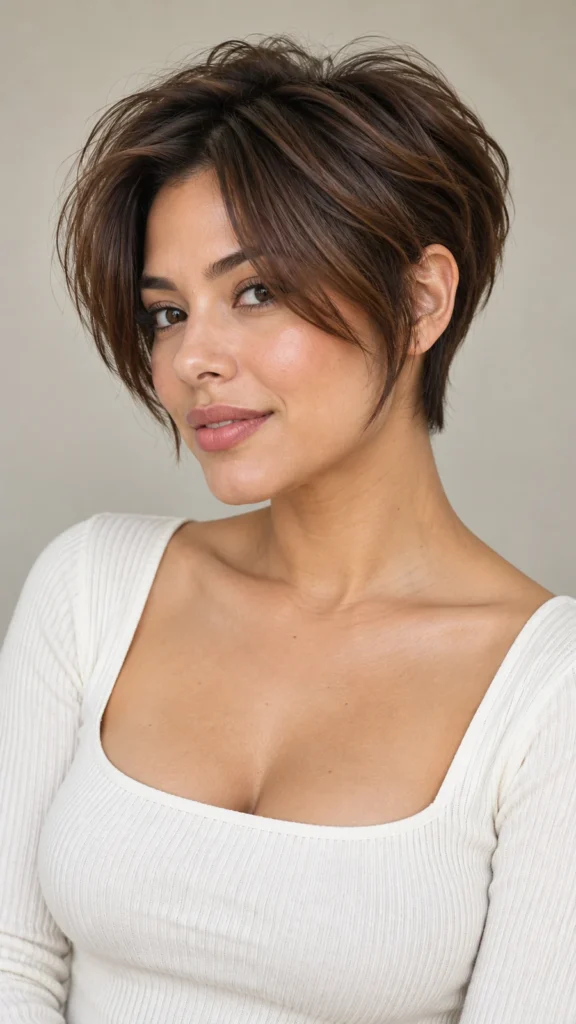
Long parted front sections soften the transition from the forehead to the sides. The rest of the cut stays short, so the contrast is easy to see. This option needs enough front length to create the opening you want without forcing a new part every day.
- Best For: Straight or wavy hair; longer face framing.
- Ask Your Stylist For: A pixie with long parted front sections blended into the sides.
- How to Style: Follow your natural part and guide each front section outward.
Sophie’s Tip: Identify the shortest point of the curtain sections in your reference.
9. Wavy Pixie With a Relaxed Front
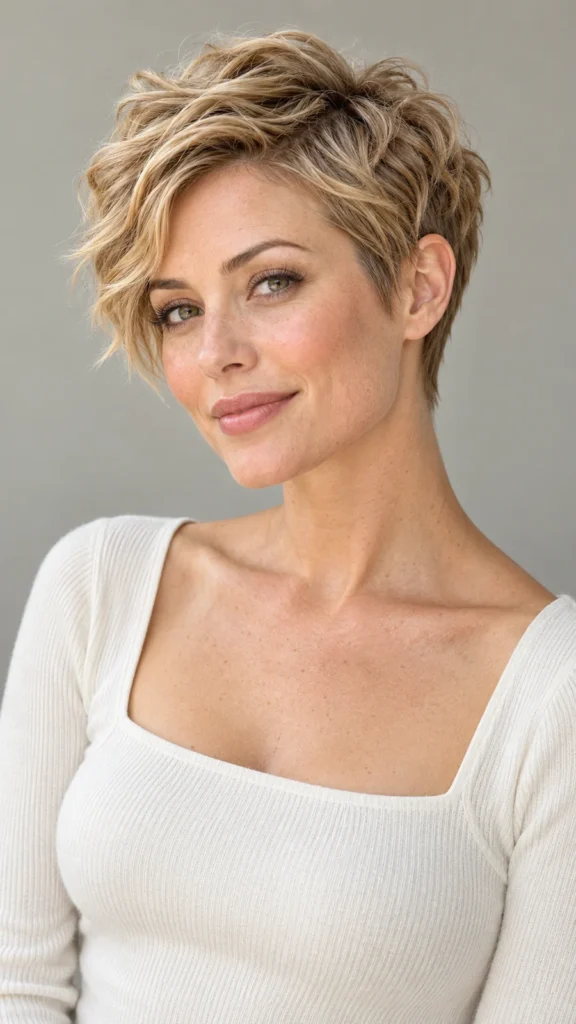
Natural bends give a wavy pixie movement without needing a sharply separated finish. Leave enough length for your waves to appear, especially at the top. A very short version may show a different pattern from the one you see in your longer hair.
- Best For: Naturally wavy hair.
- Ask Your Stylist For: A pixie with enough top length to retain your wave pattern.
- How to Style: Arrange the waves with your usual routine instead of forcing identical bends.
Sophie’s Tip: Wear your normal waves to the appointment.
10. Pixie With a Defined Side Part
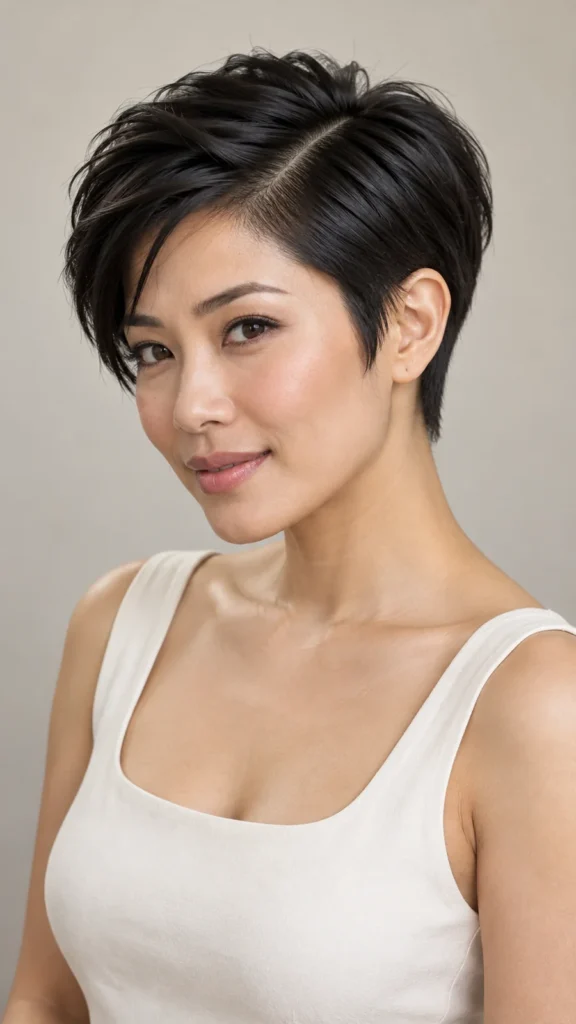
A clear side part gives this pixie an organized front outline. The cut can still have soft edges; a defined part does not require closely shaved sides. Agree on the length on each side so the part works with the overall silhouette rather than looking like a separate styling detail.
- Best For: Straight hair; a visible part.
- Ask Your Stylist For: A soft pixie balanced around a defined side part.
- How to Style: Set the part and arrange the longer top toward your preferred side.
Sophie’s Tip: Discuss whether you also want to wear it without a strong part.
11. Curly Pixie With a Longer Fringe

A longer curly fringe brings the texture forward while keeping the rest of the haircut compact. The shortest front curl may not match the stretched length you see during cutting. Discuss where the fringe should sit in your usual dry style and how much forehead you want visible.
- Best For: Natural curls; forward framing.
- Ask Your Stylist For: A curly pixie with a longer fringe planned around your dry curls.
- How to Style: Arrange the front curls without stretching them into a straight fringe.
Sophie’s Tip: Check the fringe position with your glasses if you wear them.
12. Asymmetrical Long Pixie
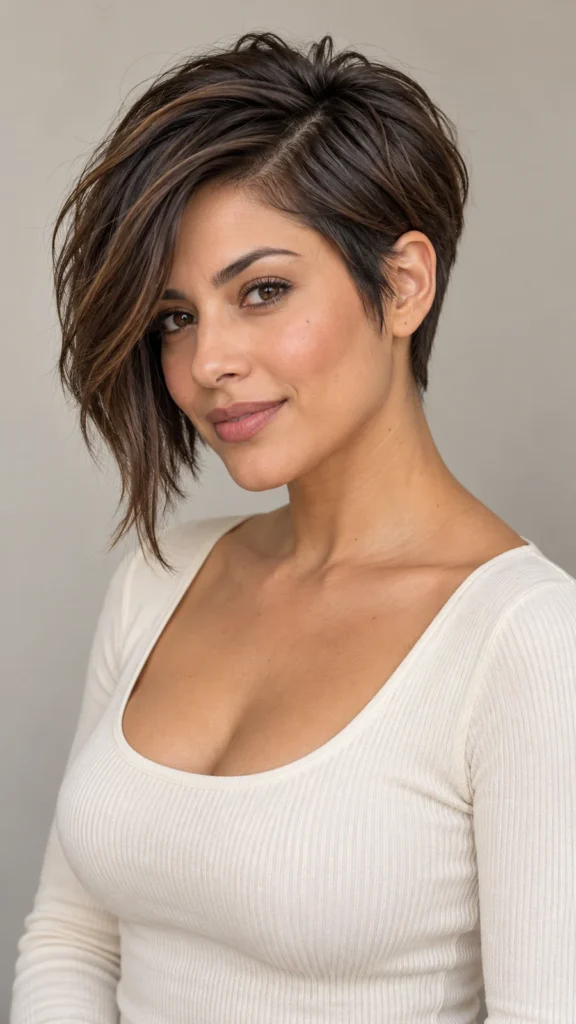
One longer side creates a noticeable difference in the outline. The contrast can be modest or dramatic, so an exact reference matters. Consider how the longer section will behave when tucked, swept aside or worn with your normal part before deciding how much length to keep.
- Best For: Straight or wavy hair; an uneven outline.
- Ask Your Stylist For: A long pixie with a clearly agreed difference between the two sides.
- How to Style: Guide the longer side into its preferred direction.
Sophie’s Tip: Name the side you want longer rather than relying on a mirrored photo.
13. Coily Pixie With a Side-Directed Top
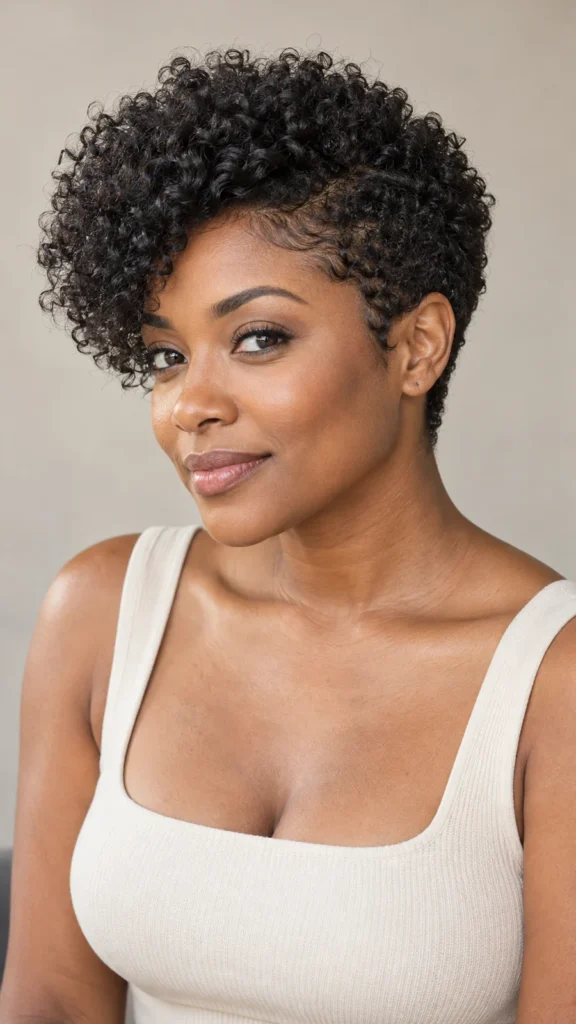
A side-directed top gives a coily pixie a different arrangement while retaining the texture. The sides can stay softly shaped rather than tightly cropped. Ask how much volume will remain above each ear and how the longer top connects to those shorter sections.
- Best For: Natural coils; side-directed styling.
- Ask Your Stylist For: A coily pixie with a longer top shaped toward your preferred side.
- How to Style: Set the front direction during your regular styling routine.
Sophie’s Tip: Show the stylist the amount of side volume you want to retain.
14. Bixie With a Soft Back
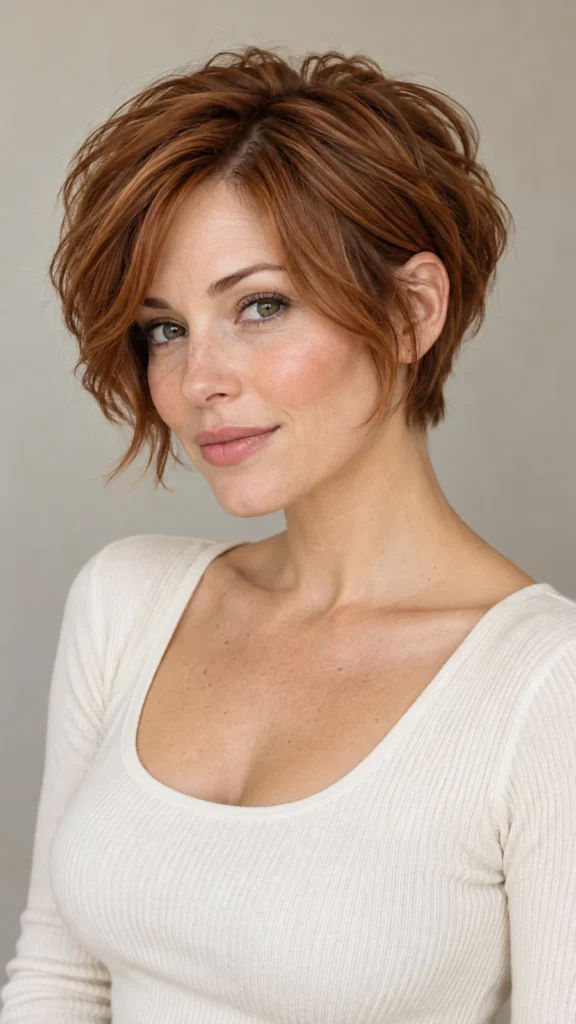
A bixie keeps some bob-like length around the sides while the back and top have a shorter layered shape. It can be an intermediate reference if you are moving from a bob to a pixie. The rear silhouette is especially useful to review because it changes how short the cut feels.
- Best For: Straight or wavy hair; a pixie-bob blend.
- Ask Your Stylist For: A bixie with retained side length and a softly shaped back.
- How to Style: Arrange the longer sections naturally or tuck them when the length allows.
Sophie’s Tip: Bring both side and rear references to clarify the blend.
15. Simple Pixie With a Light Forward Fringe
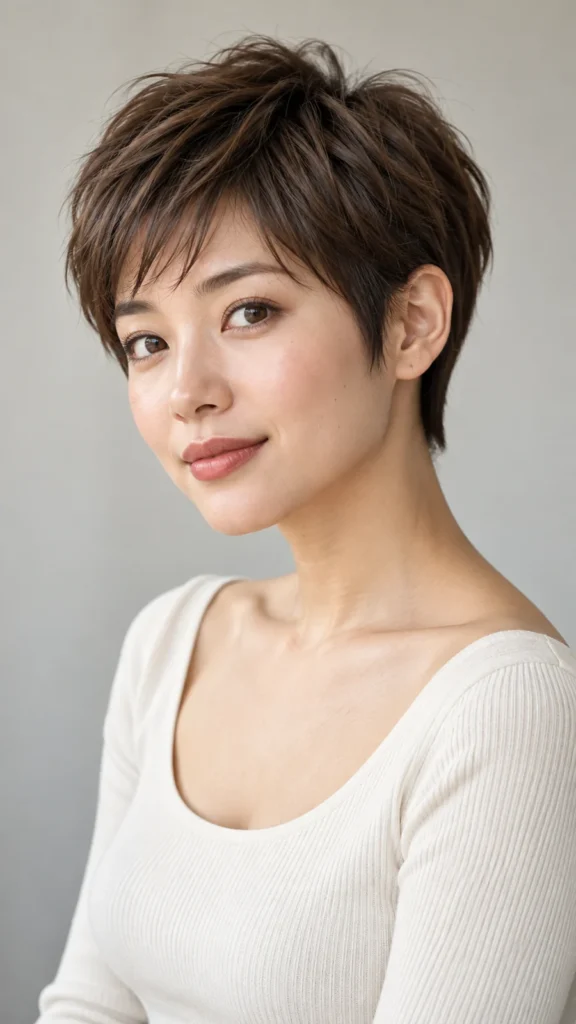
A small forward fringe gives a simple pixie one clear front detail. Keeping the finish light allows some forehead to show between the sections. The fringe width and its shortest point should be agreed separately, particularly if your front hair grows strongly to one side.
- Best For: Straight or gently wavy hair; light bangs.
- Ask Your Stylist For: A simple pixie with a narrow, lightly separated forward fringe.
- How to Style: Arrange the fringe along its growth direction and keep the top uncomplicated.
Sophie’s Tip: Ask whether your natural front direction will need daily styling.
Choose a Pixie You Like Beyond the Reference Photo
Ask to see the planned silhouette from the side and back. A longer top does not guarantee a particular finish, and a short crop may still need some arranging. Choose the amount of styling you are comfortable doing and keep the shortest sections within your own preference.
For another short-cut comparison, explore our short haircuts for fine hair.
YOUR COMPLETE STYLE
Make the look your own
Coordinate your haircut with outfit and nail ideas.
COMPLETE MY LOOK →
ABOUT THE AUTHOR
Sophie Marlowe
Sophie Marlowe is the fashion and beauty editor behind HerCurvesEdit. She shares flattering outfit ideas, modern hairstyles, nail inspiration, and practical styling guidance for women of every curve and age. Her goal is to make getting dressed feel easier, more confident, and more personal.
More from Sophie Marlowe →

[…] Compare short-cut shapes before choosing your braid in our pixie haircuts guide. […]